
Sometimes the smallest things have the biggest impact. Microgreens might look delicate, but these tiny plants have a fascinating story. Once just a garnish on fancy restaurant plates, they’ve quietly made their way into home kitchens, windowsills, and even city balconies. Why? Because they’re simple to grow, surprisingly flavorful, and packed with nutrients.
We’ll explore what microgreens are, the different varieties you can grow, and how to start your own mini garden—no backyard or special equipment required. We’ll also talk about the best time to harvest them and how to enjoy them at their freshest.
1.1 Definition of microgreens
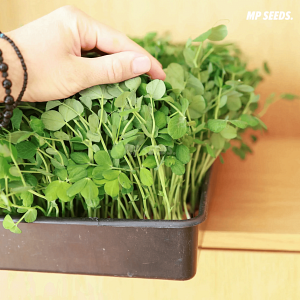
Microgreens, also called microleaves, are young seedlings of common vegetables and herbs. They are harvested early—usually 2 to 3 weeks after the seeds sprout—when the first small leaves start to grow, but before they become baby greens. Even though they’re small, microgreens are full of flavor and packed with nutrients. People often add them to salads, sandwiches, or smoothies to make meals healthier and tastier.
1.2 Nutritional Benefits
Despite their small size, microgreens are nutritional powerhouses. Studies show they can contain significantly higher concentrations of vitamins, minerals, and antioxidants compared to their mature counterparts. Depending on the variety, they are often rich in:
- Vitamins C, E, and K
- Beta-carotene
- Potassium, iron, zinc
These nutrients support immune health, reduce inflammation, and contribute to overall well-being
1.3 Differences Between Microgreens, Sprouts, and Baby Greens
- Sprouts are germinated seeds eaten whole—roots, stems, and seed coatings—typically harvested within 3-5 days. They grow without soil and are kept in water.
- Microgreens grow in soil or a growing medium and are harvested later, once their first true leaves appear. Only the stem and leaves are eaten, not the roots.
- Baby greens are more mature than microgreens, harvested when the plant has grown several inches tall and developed multiple sets of leaves. They’re commonly used in salads.
Different Types of Microgreens
There are many kinds of microgreens, and each type has its own flavor, color, and texture. Some taste mild and sweet, while others are spicy or tangy. Here are some of the most popular types, grouped by their plant families.
2.1 Leafy Greens and Herbs
These microgreens are grown from popular salad greens and herbs. They usually have a fresh, mild, or slightly peppery taste.
- Arugula – Has a spicy, peppery flavor. Great for adding a little kick to salads and sandwiches.
- Basil – Tastes like fresh basil but with a more concentrated flavor. Pairs well with tomatoes, pasta, and Italian dishes.
- Cilantro – Has a fresh, citrusy flavor. Often used in Mexican, Indian, and Asian dishes
2.2 Brassicas (Cabbage Family)
These microgreens come from vegetables in the cabbage family. Many have bold flavors and are packed with nutrients.
- Broccoli – Mild and slightly sweet with a hint of cabbage flavor. Very nutritious and easy to grow.
- Radish – Spicy and crisp, similar to mature radishes. Adds a sharp flavor to dishes.
- Kale – Mild and slightly earthy. Great in salads, smoothies, or as a garnish.
2.3 Legumes and Grains
These microgreens grow from beans, peas, and grains. They are often more filling and have a crunchy texture.
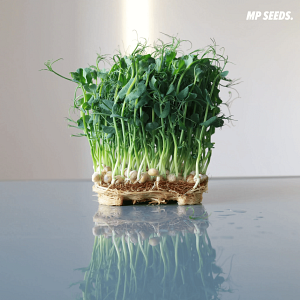
- Pea Shoots – Sweet and tender with a fresh, pea-like flavor. Delicious raw or lightly cooked.
- Sunflower – Crunchy with a nutty taste. They’re rich in protein and great in salads or as a snack.
- Wheatgrass – Has a mild, slightly sweet flavor. Often juiced and used in smoothies for its health benefits.
You can easily purchase these microgreens seeds and start growing them at home on MP Seeds: https://mpseeds.eu/
2.4 Flavor Profiles of Different Microgreens
Microgreens come in a wide range of flavors, from mild and sweet to bold and spicy, making them a versatile addition to any meal.
? Mild and sweet varieties like pea shoots, sunflower, and broccoli bring a refreshing, slightly nutty taste to dishes. Pea shoots have a delicate sweetness, perfect for adding to salads or sandwiches. Sunflower microgreens offer a crunchy, nutty flavor that works well in salads or grain bowls, while broccoli microgreens have a mild, earthy taste that adds a nice crunch to any meal.
?️For those who like more spice, arugula, radish, and mustard microgreens are great choices. Arugula is peppery and tangy, perfect for salads or pizza, while radish microgreens have a sharp, spicy flavor that adds crunch and heat. Mustard microgreens, with their spicy kick, are great for adding flavor to salads or stir-fries.
?Herbal microgreens like basil, cilantro, and dill bring fresh, fragrant flavors to dishes. Basil microgreens are aromatic and sweet, perfect for Italian-inspired dishes, while cilantro microgreens add a vibrant, citrusy note to Mexican or Asian cuisine. Dill microgreens offer a fresh, tangy flavor that pairs well with fish or roasted potatoes.
?Lastly, some microgreens have an earthy and nutty flavor, such as sunflower, wheatgrass, and beet greens. Wheatgrass has a grassy, slightly sweet flavor often used in juices, while beet greens offer a rich, earthy taste that complements roasted vegetables or hearty salads. Sunflower microgreens, with their crunchy texture, add a nutty flavor to a variety of dishes
How to grow microgreens at home??
Growing microgreens at home is an easy and rewarding way to add fresh, nutritious greens to your diet. Whether you are a beginner or an experienced gardener, the process can be simple and fun. Here’s a guide to help you get started with growing microgreens, along with essential tips on what you’ll need and how to care for your crops.
3.1 Choosing the Right Seeds
The first step in growing microgreens at home is selecting the right seeds. There are many types of microgreens to choose from, including leafy greens, herbs, brassicas, and grains.
Make sure to select seeds specifically intended for growing microgreens, as these tend to have a higher germination rate and are free from any harmful chemicals. For high-quality microgreens seeds, check out MP Seeds, a reliable source offering a great selection for your growing needs.
3.2 Growing Supplies
You don’t need a lot of equipment to get started with growing microgreens, but there are a few basic supplies you’ll need. To begin, you’ll need growing trays, which should be shallow and have drainage holes to prevent water from pooling. You can use coconut coir or coco mats as your growing medium, which are great for retaining moisture while providing proper aeration for the roots. You’ll also need a light source, either natural or artificial, to ensure healthy growth.
3.3 Selecting Trays and Containers
When selecting trays and containers for microgreens, look for shallow trays, around 1-2 inches deep. These trays should have drainage holes to avoid waterlogging, which can lead to mold growth. For a simple setup, you can use regular plastic trays or even repurpose containers from the kitchen. If you want to take your growing setup a step further, specialized microgreen trays with a self-watering system can help maintain moisture levels for you.
3.5 Light and Temperature Requirements
Microgreens need plenty of light to grow, but they don’t require direct sunlight. A bright windowsill or under grow lights will work well for most varieties.
The ideal temperature for growing microgreens is between 10°C and 22°C. If you’re using artificial light, make sure to keep it on for around 12-16 hours a day to simulate sunlight.
3.6 Watering and Care Tips
Microgreens require consistent moisture, but they don’t like to sit in water. Ensure that your growing medium stays damp, not soggy. Mist the surface with a spray bottle to keep the soil or mats evenly moist, especially during the early stages of growth.
If you’re using trays with drainage holes, make sure the excess water drains properly. Keep an eye on your microgreens for any signs of wilting or yellowing, which can indicate either too much or too little water.
When to harvest microgreens?
4.1 Best way to harvest microgreens
The best time to harvest most types of microgreens is when the first true leaves have fully formed. This usually happens around 7 to 21 days after sowing, depending on the variety.
The true leaves are the second set of leaves that grow after the cotyledons (the first leaves). To harvest microgreens, use sharp scissors or a small knife to cut them just above the soil line. For growing microgreens at home, it’s important to ensure your tools are clean to prevent contamination.
4.3 Post-Harvest Handling and Storage
Once you’ve harvested your microgreens, handle them with care to preserve their freshness. Gently rinse them in cold water to remove any soil or debris and then dry them thoroughly with a paper towel or a salad spinner.
Store your freshly harvested microgreens in an airtight container or a resealable plastic bag in the refrigerator. They should remain fresh for about 5-7 days. Proper post-harvest handling is essential to ensure you enjoy the full benefits of the microgreens, whether you’re eating them for their flavor or nutritional content.
4.4 Extending Freshness After Harvest
To extend the shelf life of your microgreens, consider wrapping them in a damp paper towel before placing them in a storage container. This helps retain moisture and keeps the microgreens fresh longer.
Some types of microgreens, like sunflower or pea shoots, tend to last a little longer when stored properly. If you’re growing microgreens at home in larger quantities, freezing them is an option, though it may affect their texture. For best results, consume your microgreens as fresh as possible to get the most out of their flavor and nutrients
Conclusion
- Microgreens are nutrient-packed: They can contain up to 40 times more vitamins and minerals than their mature counterparts. For example, broccoli microgreens have 6 times the amount of vitamin C compared to mature broccoli!
- Flavorful varieties: From spicy arugula to aromatic basil and tangy radish—there’s a microgreen to suit any taste preference. Did you know sunflower microgreens are not only crunchy but also packed with protein?
- Easy to grow at home: You don’t need a garden—just a sunny windowsill and shallow trays. Microgreens grow quickly, often within just 7-21 days!
- Freshness tips: To keep your microgreens fresh, store them in the fridge for up to a week and try wrapping them in a damp towel.